Tuesday, 31 January 2012

Decorating with empty picture frames

My inspiration for this project came from an episode of Property Brothers on HGTV.  In my living room, I have a long wall above my 9ft sectional sofa. The artwork I had by default on this wall was the wrong scale, and I was tired of looking at it.


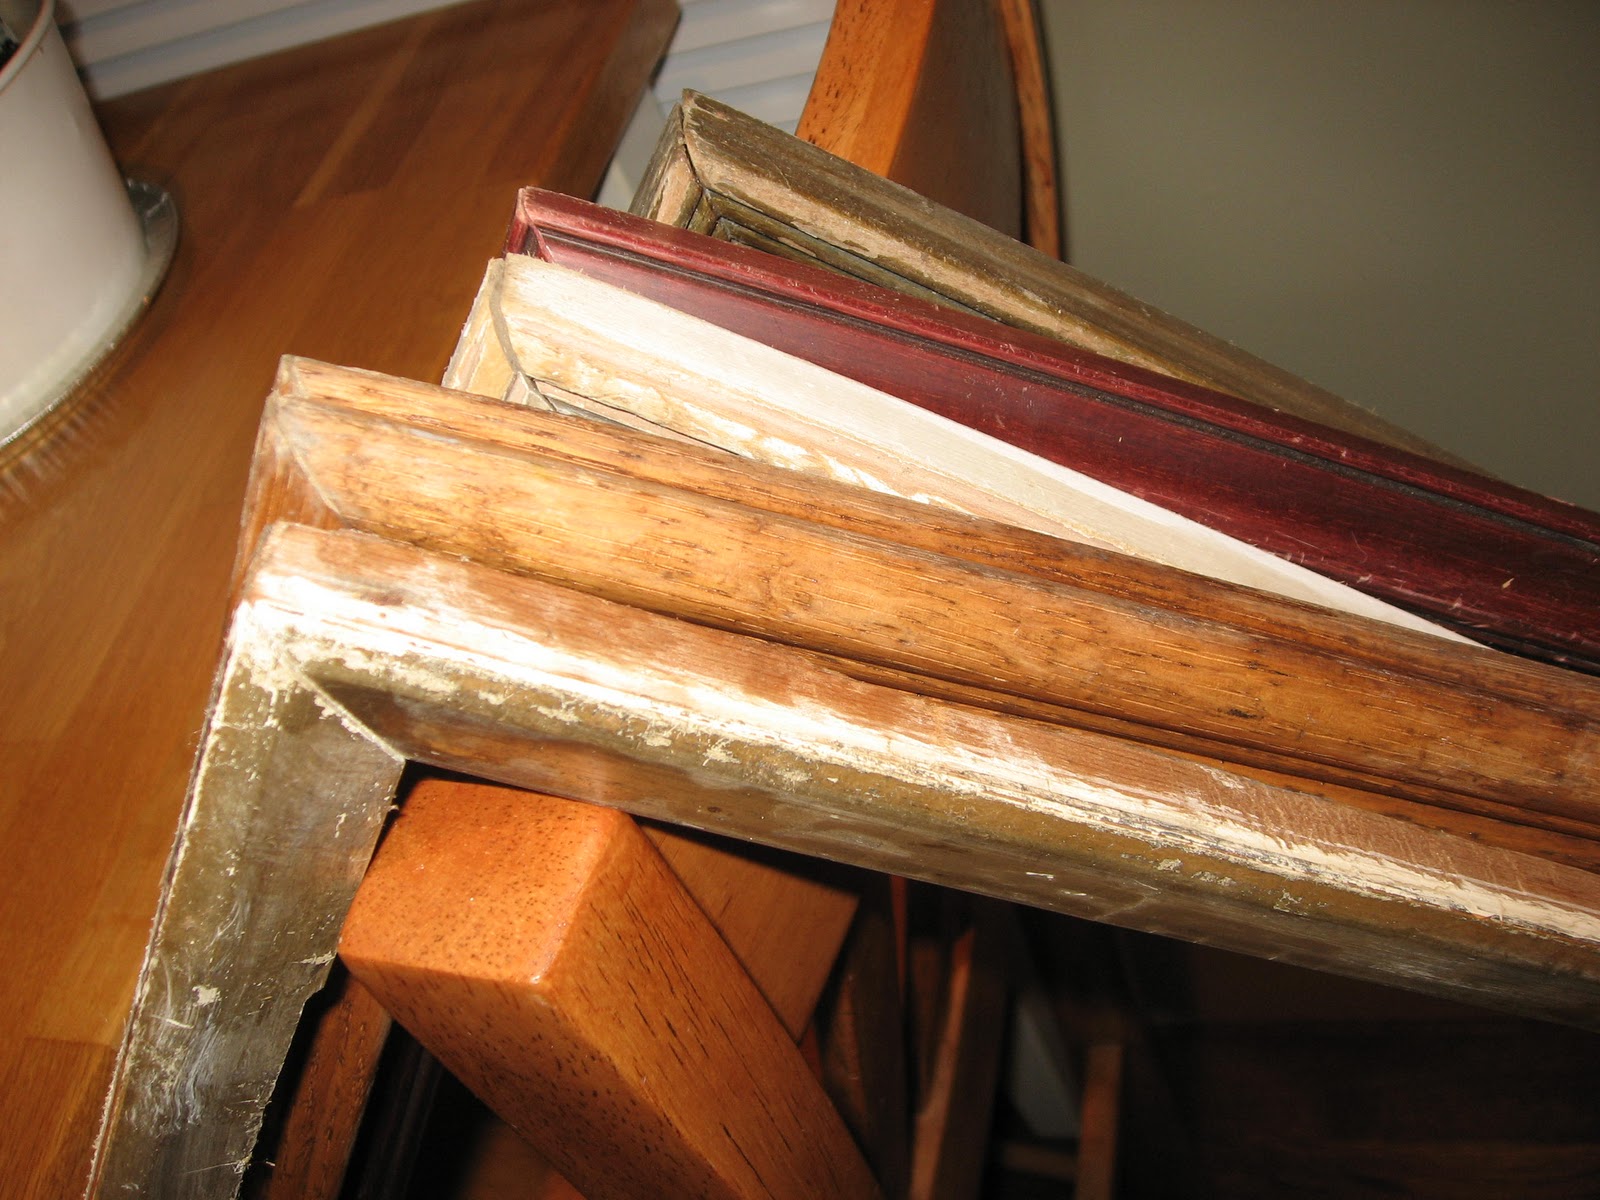
First step was to find a bunch of old picture frames for CHEAP. I went to a great old salvage yard/antique store and found 12 solid wood frames.  I carefully selected the frames by placing them on the floor of the shop, arranging to make sure the collection would be balanced.


Most of the frames needed re-gluing of the joints and re-squaring, and all needed a good sanding and cleaning.  


I then affixed the picture hanger clip to the top centre of each frame, then painted them all the same colour.


In order to install them on the wall in perfect symmetry, I first arranged the frames on some craft paper and traced the frames. Numbering the frames and the craft paper outlines helps match up the frames along the way.  I then measured the distance in mm from the top of each frame to the spot on the hanger bracket for the nail head, and marked this spot on the craft paper. 


The craft paper was then hung on the wall perfectly centred on the sofa wall and perfectly level. 


I nailed through the paper at each marked spot, then removed the craft paper from the wall. 
I then hung each frame.  I used a small amount of double sided tape on the bottom corner of any frame that was refusing to sit level.


Total cost of this project:
$15 for 12 frames
$5 for picture hangars
$0 for paint (already on hand)

Sunday, 1 January 2012

Things to do with wine corks

Wine corks have lots of great uses once your wine bottle is empty.

Message board
Attach the corks with a hot glue gun to the inside backing of any picture frame to create a functional message board. Before affixing with hot glue, first dry fit the corks in the chosen pattern. I like alternating two corks vertical, then two corks horizontal and so on.


Trivet (hot pad)
Option 1: Choose any size flat backed photo frame, and hot glue the corks to the inside backing. Up to 8" x 8" works well.

Option 2: Glue wine corks together in a 'standing' formation. I selected all red wine corks because I like the look of the stained red end. 89 corks were used in this project. First, open a bottle of wine and pour yourself a glass.  Next, collect your inventory of old wine corks together on the table. 

 Once you have your corks collected, arrange together standing on the table.  Select the shortest one in the group and measure it to the exact mm.  My shortest cork measured 45mm. All the rest of the corks will have to be cut down to this size.  The corks cut easily with a paring knife or utility knife. Make sure to cut the 'bad' end, leaving all the red sides in tact. 


Start with one cork and place five corks to surround it. Hot glue those five corks to the single centre cork.  Then build another circle around those, one 'layer' or row at a time. I stuck a sewing pin on the corks of the inside layer as I built the next outside layer so I could keep track of the rows. 

Voila!


Wreath
Start with a styrofoam or straw wreath form, and hot glue the corks.

Where to collect wine corks
Home -  Save your own corks from bottles that you drink at your own home.
Wineries - When you visit a winery, ask them if they save their used corks.  Most of them will be happy to give you them for free.
Wine Festivals - Ask each wine station to save their corks and collect them from the stations at the end of the function.
Restaurants - most throw them away, but if you ask, they will probably save them for you. 

T-shirt quilts

Many years ago I was at Kits Beach in Vancouver and saw someone with a beach blanket made from old t-shirts.  What a great idea!  My own dresser drawers were bursting at the seams with old t-shirts that I just couldn't seem to part with, and now I know what I'm going to do with them.  I even started collecting t-shirts from my travels with the purpose of adding them to my quilt.  

Step 1:
Cut the shirts into 14' squares.
Options:
- Sometimes the decal or emblem is on the sleeve or lapel, in which case, I cut the emblem and patch it onto a 14" square blank shirt section cut from the front or back of that same shirt.
- If you have child sized t-shirts, you won't be able to cut a 14" square because they are too small.  In that case, cut out the emblem and sew it onto a blank t-shirt square
- If your printed emblem is longer than 14" just cut the peice to 14" wide x custom length, then find another t-shirt with a small emblem and pair them together for a combined length of 28". This will ensure your grid is balanced out.
- If your t-shirt has something memorable printed on both the front and back, cut out and use both.
- Sometimes the thing you want to incorporate onto the t-shirt quilt isn't actually a t-shirt.  It can be a pair of memorable jeans or a university jacket.  In that case I'll cut the peices of the item and sew together a 'collage' of the bits onto a 14" square of t-shirt fabric.
- If you don't have enough t-shirt squares to make the size quilt you want, consider adding photo transfers of members of the family or favourite travel photos.  Print the photos onto t-shirt iron-on transfers (available at office supply stores), then iron onto 14" blank t-shirt squares.  Another idea is to have the children in your life create their own t-shirt square with fabric paint. 

Step 2:
Blanket size
Based on how many square you have, you can determine the size of your blanket.
Options:
1-2 squares - toss cushion - with one t-shirt square and a selected back fabric (or t-shirt squares on both sides) you can create a cover for a toss cushion.  IKEA has the best prices for cushion forms - check out the size options before you cut your t-shirts up.
16 squares - 4 square x 4 square will make a nice sized couch throw.
24 squares - 6 squares x 4 squares will make a small beach blanket or cover a single bed
30 squares - 6 squares x 5 squares will make a medium sized beach blanket or cover a double bed
36 squares - 6 squares x 6 squares will make a large beach blanket or cover a queen bed

Step 3:
Backing
The blanket needs a backing.  You can either use a solid fabric backing, or if you have enought t-shirt squares you can double side your blanket with t-shirt squares on both sides.

Step 4:
Blanket style
Beach blanket:  I love the idea of using the t-shirt quilt as beach blankets, which means I didn't need any batting for warmth between the layers. Also very easy to launder.
Bed cover: By adding a layer of batting between the layers it's easy to turn the blanket into a warm quilt that can be used as a bed cover or couch throw.

Step 5:
Start sewing
Sew columns of t-shirt squares.
Press the seams flat.
Sew the columns together.
Press seams flat.
Once you have the 'front' of the t-shirt quilt sewn together into one large sheet, then it's time to connect the front to the back.  With right sides facing, sew three of the four outer edges together, then turn inside out and press edges. This is when the carefull pinning and time consuming part starts. Taking one row at a time, carefully pin the front to back along the seams of the t-shirt squares.  Once pinned, connect the front to back by sewing along the seams. Once you get to the open edge bottom, press a folded edge on both the front and back, pin and sew together.

I just love these t-shirt quilts. I have created one for myself, as well as for family and friends.  If you'd like me to create a quilt from your memorable t-shirts, I have been known to hire out my services as well. The cost is roughly $10/square + any materials required (ie. solid fabric backing, batting for quilted blanket).

Heather Fulcher
heatherfulcher@gmail.com


Friday, 23 December 2011

Ice lanterns

This is a great idea for inexpensive holiday decor.  You can buy shaped molds at Lee Valley Tools to make these ice lanterns, or you can use an old tin, yogurt container or even juice glass. Just make sure to choose something that does NOT flare in at the top.

Step 1:
Fill your vessel part way up with water, then place it level inside the freezer.
Option: add items into the water relating to the theme of your event.  At Christmas you can add cranberries, or evergreen sprigs


Step 2:
Once the first level is frozen, set a smaller vessel inside and weight it down with pie weights or rocks. Add water to the top of the container, and place level inside the freezer.


Step 3:
Remove from the freezer and set-out at room temperature for a short time.  The lantern will slide out of the mould once it thaws slightly. Place a tea light or battery candle inside the lantern cavity, and enjoy!  I placed several of these ice lanterns along the walkway up to the house for my Christmas party.  You can also use the an ice lantern on a table centerpiece (with plate or platter underneath).


Saturday, 26 November 2011

Bedside table - before & after

I purchased this little bedside table for $20 on Craigslist.  It had cigarette burns on the top, a very ugly and dated wood finish, and ugly hardware. However, it is solid wood construction, and I could see the potential.

Before
First I sanded the top to take off the finish, and applied a new coat of stain.
Then I painted the base and drawer with some off-white semi-gloss paint that I had on hand.
I added a new modern handle for $4, and a basket for storage for $6, and voila!


Sunday, 14 August 2011

Framed antique coat hook collage

This project was inspired by an episode of "Dear Genevieve", where she decorated a livingroom wall with a collection of antique coat hooks of different vintages, styles, sizes and metals.  I set about to collect antique coat hooks for the next year or so, picking them up whenever I saw an interesting one at a flea market, antique shop or salvage yard.  I then found an antique picture frame at an old salvage yard (for free!), then painted it white. I bought a piece of hardboard at the home improvement store ($2), cut it to fit inside the frame, and painted it the wall colour. I arranged the hooks onto the hardboard, then used epoxy to glue them into place on the framed hardboard.